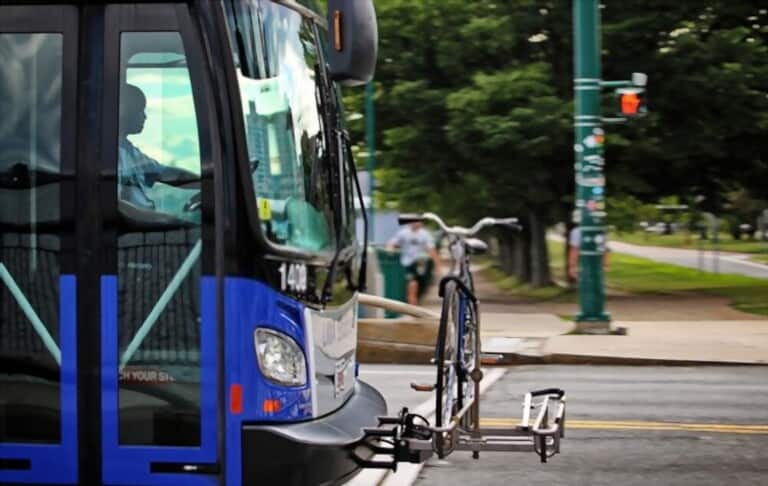
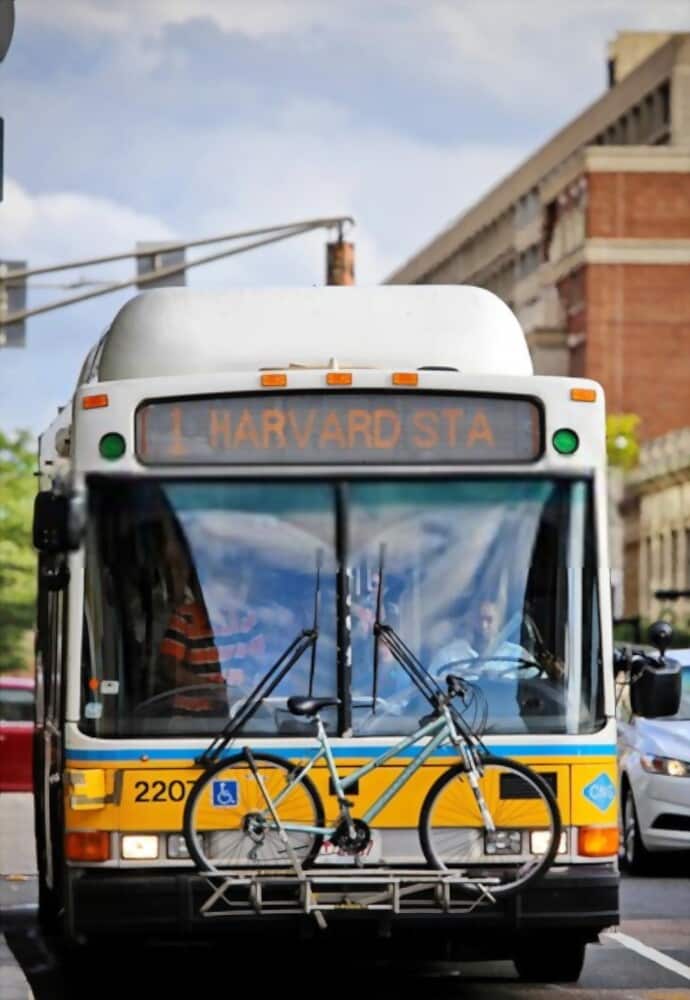
The majority of individuals favor riding bicycles for transportation. This gets less practical, though, if you need to travel further. Bike racks are a common feature of city buses, usually located at the front bumper. There, you may quickly attach your bike, board the bus, and get where you're going. When you are waiting for the bus, take off any loose goods from your bike, let the driver know you're using the rack, and then walk in front of the vehicle to quickly mount your bike.
When may you use the bicycle rack?
All buses have bike racks that are accessible at all times. They are supplied on a first-come, first-served basis and contain two bicycles. If there is space on the bus or bike rack is occupied, the driver may permit bikes to ride, although this is at his or her discretion. According to the time of day, a motorist might decline if they anticipate a busy road. The bike must be held by the transit user, who must also make sure that everyone can use the aisle.
The bike racks are open to everyone. Younger riders must be supervised by an adult. The bike must be loaded and fastened to the rack by the passenger.
How To Use Bike Rack On Bus
Aware about policy to use bike rack on bus
- Bicycles with electric or battery power are not allowed inside the bus.
- When they use a bus bike rack, passengers under 12 years old should be escorted by an adult.
- The cost of moving your bike is free. There is no need for a specific permit or reservations in advance.
- The bus driver won't get out to help you load or unload your bicycles due to safety concerns.
- First-come, first-served bicycle racks are available and may hold up to three bikes at once. You will need to wait until the next bus arrives with an open bike rack if indeed the bike station is already filled.
- Bicycles with three wheels, tandems, or recumbents are not permitted since they cannot be stored in the racks securely.
- Gas-powered bikes with motors are not allowed.
How to Load Your Bike
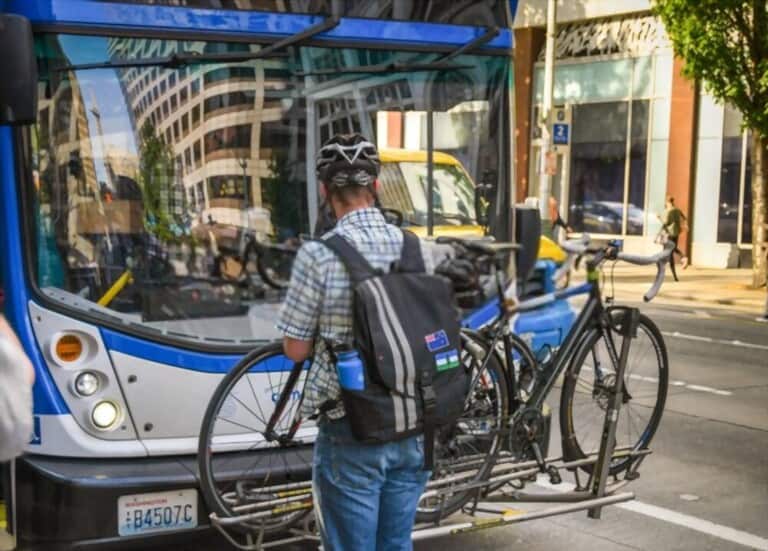
Arriving at the bus station early and while you wait, get your bike ready to load. Any loose or removable accessories, including bottles of water, bicycle pumps, panniers, and more, should be taken from your bike. If you don't, your bike might not fit properly on the rack.
Bring a bag so you may store your miscellaneous stuff and bike parts inside of it. To load the bike onto the rack, you'll need free hands. You must board the bus with any excess luggage. You cannot secure your bicycle or backpack to the rack. This will make boarding go more quickly.
Step 1
Before standing ahead of the bus, let it come to a complete stop. Till the bus arrives at a complete stop, stay on the curb. As the street approaches, do not cross it. Consider bringing a small flashlight if this is dark outside and you're concerned the vehicle won't see you standing on the curb. Use it to signal the bus because it draws near.
Step 2
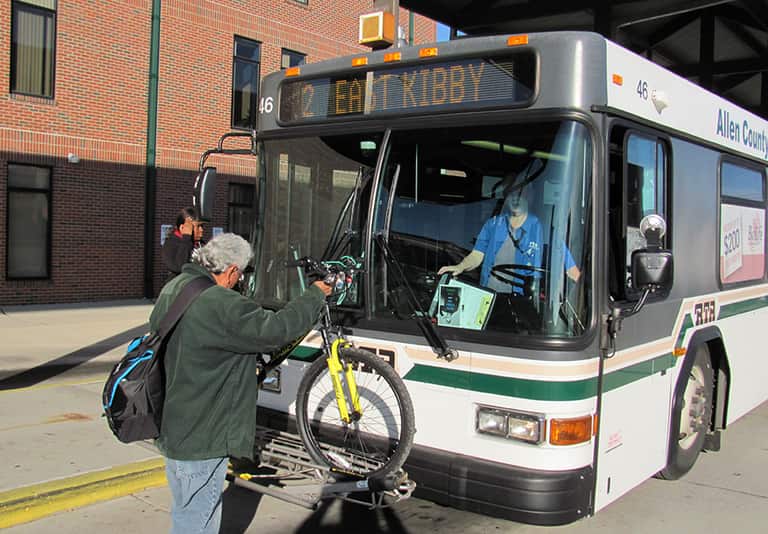
To let the driver know you are packing your bike, eye contact is necessary. You don't have to go on the bus and tell the driver you want to utilize the bike rack out loud. Eye contact, nod, show your bike, and wave to the other person. Before you approach the rack ahead of the bus, wait for the driver to signal to you.
Step 3
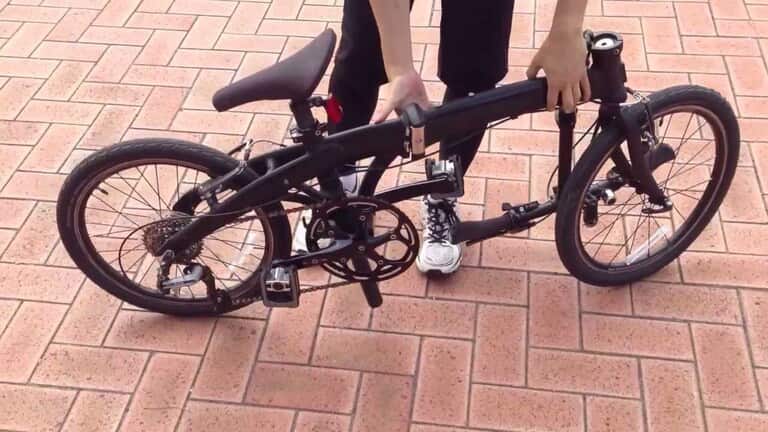
Alternatively, fold your bike and bring it with you when you board. Generally, if your bicycle can be collapsed or folded, you can take it on the bus. In this instance, you won't need to use the rack. In order for your bike to fit within a typical piece of luggage, it must be folded. Position your bike underneath the seat and out of the aisle when you board the vehicle.
Step 4
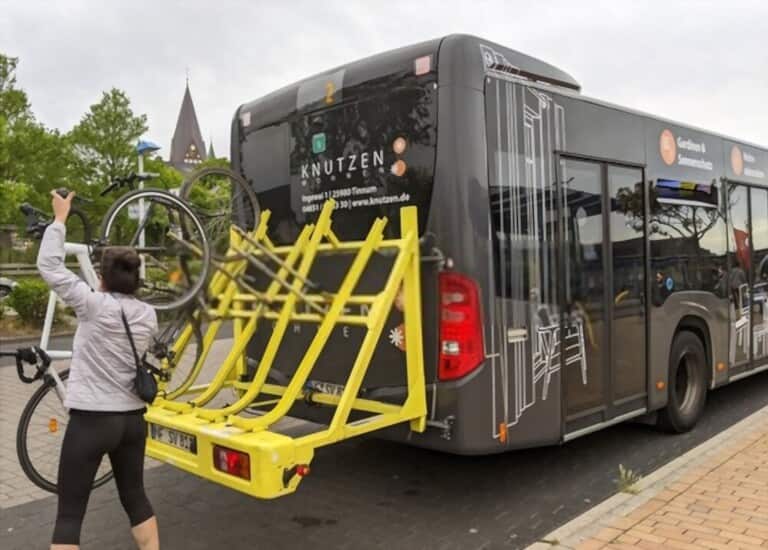
The bike rack is right next to the bus, so saunter there. Most city buses have bike hooks on the front bumper. You'll be able to determine if your bus has a rack and whether it is already loaded with bikes when it draws near. Typically, bike racks can hold no more than two to four bikes. If the bicycle rack is now filled, wait until the following bus.
Step 5
Reduce the bike rack by pulling and squeezing the handle. The locking pin is released by squeezing the handle. If there are no additional bikes on the rack, you only must do this. The bike rack will be lower for guests if it already has bikes attached on it.
Step 6
Lift your bike up using the stem and seat tube. The vertical bar that joins your bike's front and back wheels is called the stem, and it is located directly behind the seat tube. Put one grip on every spot and lift the bike up with your arms. This position offers the most power and strength for holding the bike.
Step 7
Place the wheels of your bicycle in the spaces given. The bike rack has pre-installed slots that your wheels can slide into. Since this varies, consult your rack for instructions on whether to load the front or rear tire first. The slots will typically have labels that are easy for you to read.
- Use the space nearest to the bus if the racking is empty.
- Use the closest accessible space to the bus whether other bikes are now mounted.
Step 8
Over the front tire, raise the support arm and fasten it. Completely remove the support arm, then raise it above the front wheel. Make sure the support arm is firmly affixed to the top of the rear tire. It shouldn't lay on the brake or fender.
- To remove the support arm and draw it out of some rack, you may be required to activate a button somewhere at the end of it. Pulling the arm won't cause it to move; instead, locate the eject button and push it.
- Never attach your bicycle to the rack with your own lock.
How to Get Off Your Bike
Before you disembark, let the driver know that you will be unloading your bike. Inform the bus driver that you must remove your bike from the station at the following stop. In order to ensure that the bus driver knows and understands you, it is usually preferable to do this orally. Before you exit the bus, ensure that the driver has acknowledged your statement.
If you don't warn the driver before leaving, they can leave the rack while your bike is still attached. Check the webpage for your local transit system for instructions if this occurs.
- Pull up just to support the conclusions and push to the side to release your bike.
- Exit the rack with your bike in tow.
- Trying to squeeze the washer out and elevating the rack till it locks back will allow you to fold its rack against the bus if it is empty.
- Once getting on your bike, head back to a curb and wait for the bus to depart.
Benefits of putting racks on bus
- Combines bicycles with public transportation
- Shown to encourage riding because
- Encourages longer travels and reassures individuals that are less secure
- Offers a dependable alternative in an emergency or period of bad weather
- Improves bus use and expands the bus's service area
- Clean bikes can be transported securely outside of packed buses, which is crucial during rush hours.
- Simple and quick to use
- A safe and secure way to keep the bikes still
- Does not impair the driver's vision, even while carrying two or three motorcycles
Conclusion
Overall, please be aware and remember that putting, securing, and moving your bike are all tasks that must be completed by you, the rider, and not the coach operators. So, read carefully this article to know how to use the bike rack on the bus to avoid putting your bike in unexpected cases.


