Mass fishing nets created can be costly to repair and pain to store and/or fly. Luckily, net-making is a good art, which makes practice simpler.
Even if fish netting can be helpful for people, we can only accept that it still has its pitfalls because it can lead to the loss of the sea.
You would only need to begin with the basics, which are a shuttle or the binding needle and the gage.
Phase 1 : Set Up Everything
Choose the string
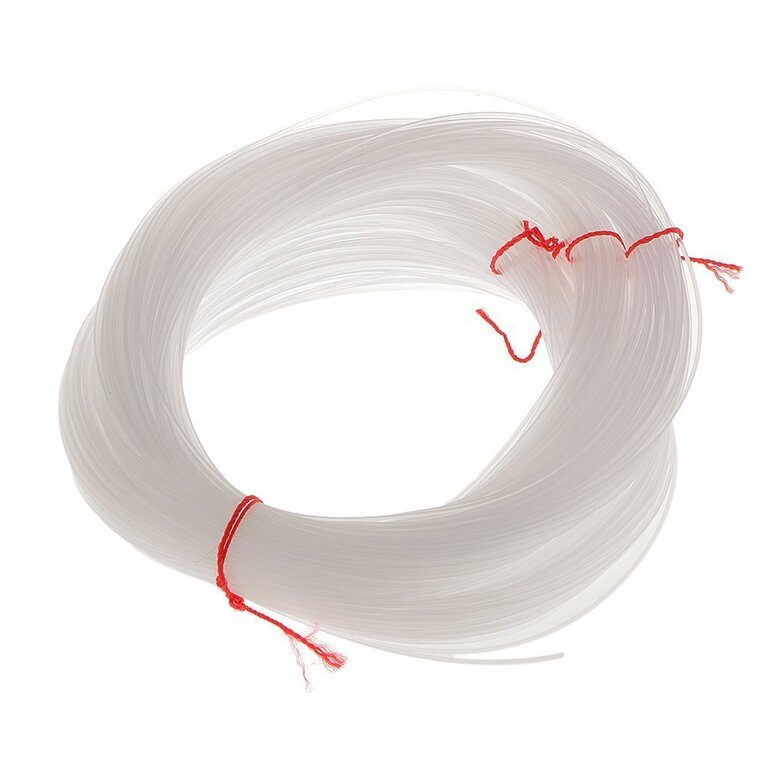
In principle, some rope or twine may be made with your fishing net. Consider which species you are attempting to capture and how its size may impact the force of the line.
You can use a nylon bonded string for durability. It is the longest and most consistent of all modern twines.
Try playing with any string you''ll purchase, whether you do not have any nylon at hand and can get enough of it.
Make a shuttle and have a gauge
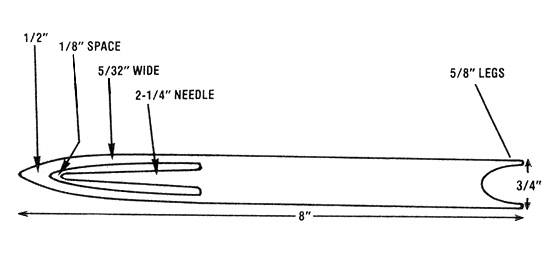
Your shuttle and gage are the two main components for the network making operation . You will find both the shuttle and scale at the sports goods shop or in the local craft.
The size of the final net mesh is determined by your gage diameter. Each mesh square diagonally is similar with your gauge's diameter.
The shuttle is the tool that you are weaving the net with which must be narrower than the gauge so that the gap created for the mesh is come through
Set up your making area
This table is ideally wide enough to be placed flat on your full net. Although this is not important, it will be useful as it tries to rest the net.
All you need now is a nail (or a clamp on the other side of the counter) on the edge of the table. This rod will now be the start of your net.
Circle this part around the middle and go back to you, and repeat the cycle once you're out of the spindle or the shuttle is enough full to manage.
Phase 2 : Preparing the Net
You will have to cover your twine for your net to start with. When you're out of twine, tie the edge to a separate spool of twine until the shuttle is finished. Break off the labels on the tie and keep waiting.
Put in your hands your shuttle flat and put the twine mostly on top, facing you.
Take the spin and circle all over the shuttle's core so that it gets back to you.
Place the string parallel to the end of the shuttle on the same side, flip it down and run it on the opposite side.
Make a loop with a knot
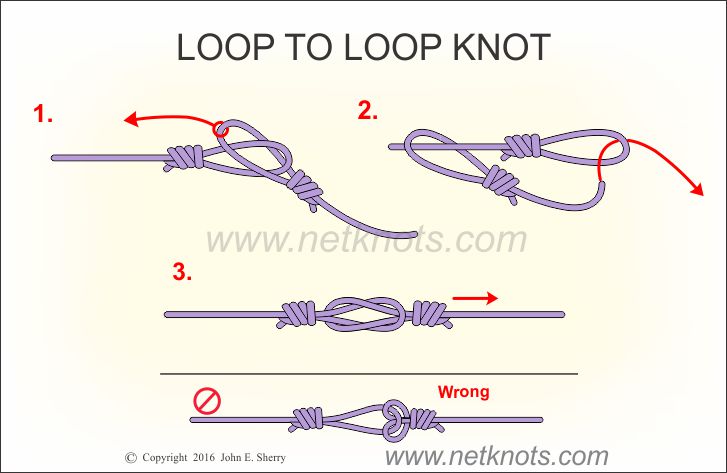
The loop in this move must be equal to your measurement distance, so that your shuttle can travel through it. Do not think so much about scale accuracy; as much as the shuttle is able to get through, it's all right. When this circuit is complete, it is foreign at the edge of your net.
The overhand knot is the one everyone knows about: you go all over the loop to the end of the loop, tightening both ends.
Take the loop from the knot and place it around the pin you are using.
Place your gauge
As discussed above, the final dimension of the net holes in the finished net will be determined. Each net you create begins with a rectangle, whose sizes start here.
Slide down the gauge below the string fixed to the new thread. The loop must be placed on the binding so it is a knot nearest to you; bring the gauge to the knot to reach the top of the gauge.
Keep the string above the gage with your thumb and then use the shuttle hand next to it.
Pull up the shuttle through the loop
At this moment, you want to tighten the string that is done in that move around your size. You will strive to duplicate the straightness with which the string grabs the size of the measurement in this step while you proceed.
You can drag the shuttle into the circle from the right to the left of your fastener and loop and gage (through the V shape made by the peg).
Then take it back and squeeze the gauge closely. Put the finger on the top of the knot and catch the thread.
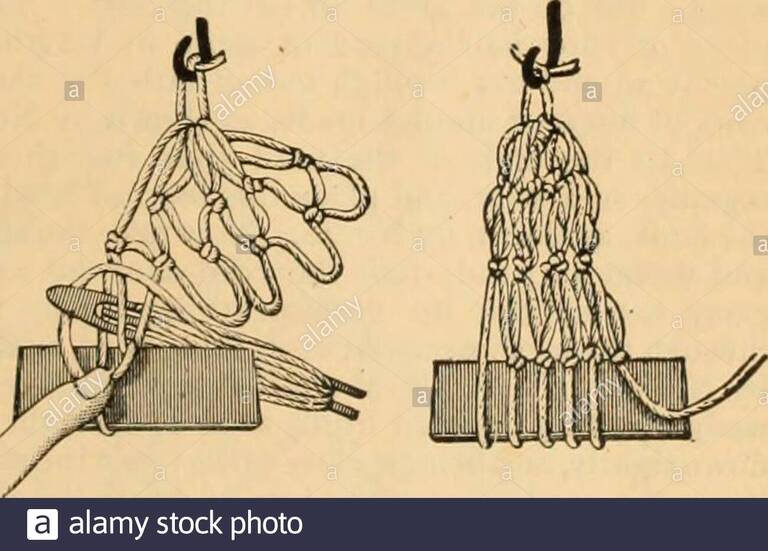
Make another knot
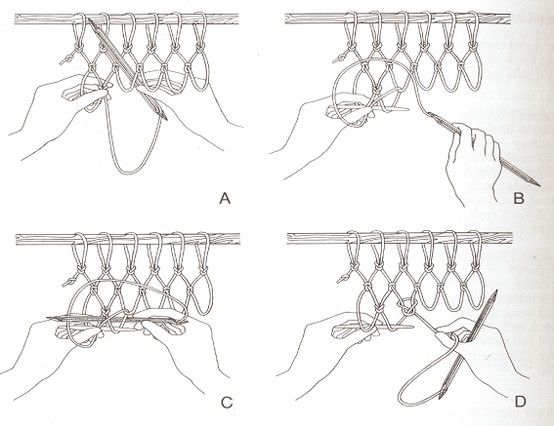
Repeating the knot is necessary for your completed net's ultimate power. The more knots you do, the sturdier it will be
Take your shuttle to the right of your pin and loop and move it under loop. Now it's a lowered loop under the tight loop should be changed.
Pass the shuttle below this loop and then go right of the taut loop and pull up the shuttle till the shuttle is fully tight. Then continue the cycle again
Take off the gauge
You should keep two loops mostly on a pin together with the rest of your string tied to your shuttle from the initial loop.
In order to begin the operation, you must choose one of these two loops and it doesn't mind that. The moment your net is created, both will be tackled.
Phase 3 : Complete your net with frame or weights
You can tie it to a wooden frame that you have in the net or create a casting net by adding long ropes and weights based on how you like using it. Regardless of what you want, make sure your net is stored in a manner not tangled.
In any situation, it is appropriate to tighten the net or tighten the net to a frame with additional string bits.
CONCLUSION
There are many means of catching fish and it is better known for fishing nets. They use fishing networks in the sardine sector to catch and commercialize millions of sardine fish. The fishing net is useful as it will provide the fishing population with ease, and also because the rules on overfishing need to be made clear and careful.
Fishing is nothing more than a right that nature will offer, but even we have to be aware of what nature gives us. We must prevent overfishing and other techniques below that will kill life and destroy it.
It's up to them and they too have been respectful of our everyday needs and nutrition.


