Typically, a companion has a vital position on the bottom, each cabled climber attaching to the rock or gym wall. The belayer manages the seam skilfully and is able to collapse whenever necessary.
Belay is fundamental knowledge that a trained instructor must teach early climbing classes to teach them. This essay addresses the fundamentals of top-level learning but is not intended to replace palm learning. The Essential Steps In How To Belay Include:
- Gearing Up To Belay
- Set-up
- Technique
1. Gearing Up to Belay
Typically, a companion has a vital position on the bottom, each cabled climber attaching to the rock or gym wall. The belayer manages the seam skilfully and is able to collapse whenever necessary.
Belay is fundamental knowledge that a trained instructor must teach early climbing classes to teach them. This essay addresses the fundamentals of top-level learning but is not intended to replace palm learning.
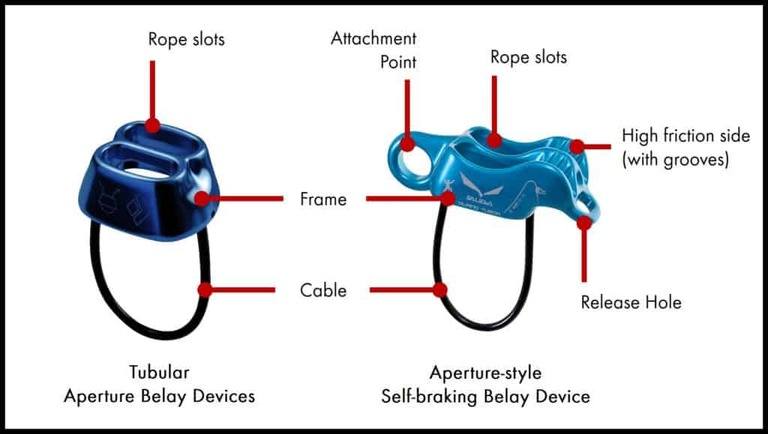
This article concerns a tubular device on the ceiling. For various causes, belay methods differ. You must study and execute procedures on new technology if you chose a device other than the one you were initially instructed to use. Although the simple top rib belay on several systems is identical, some specifications vary. And it can be quite another to lay a lead climber, especially on a brake-assist.
- Tubular Belay Devices
Best For: Multiple Climbing Workout
- Assisted-Braking Belay Devices
Best For: Sport Climbing
- Figure 8 Belay Device
Best For: Caving, Rappelling
2. Set Up The Belay Devices
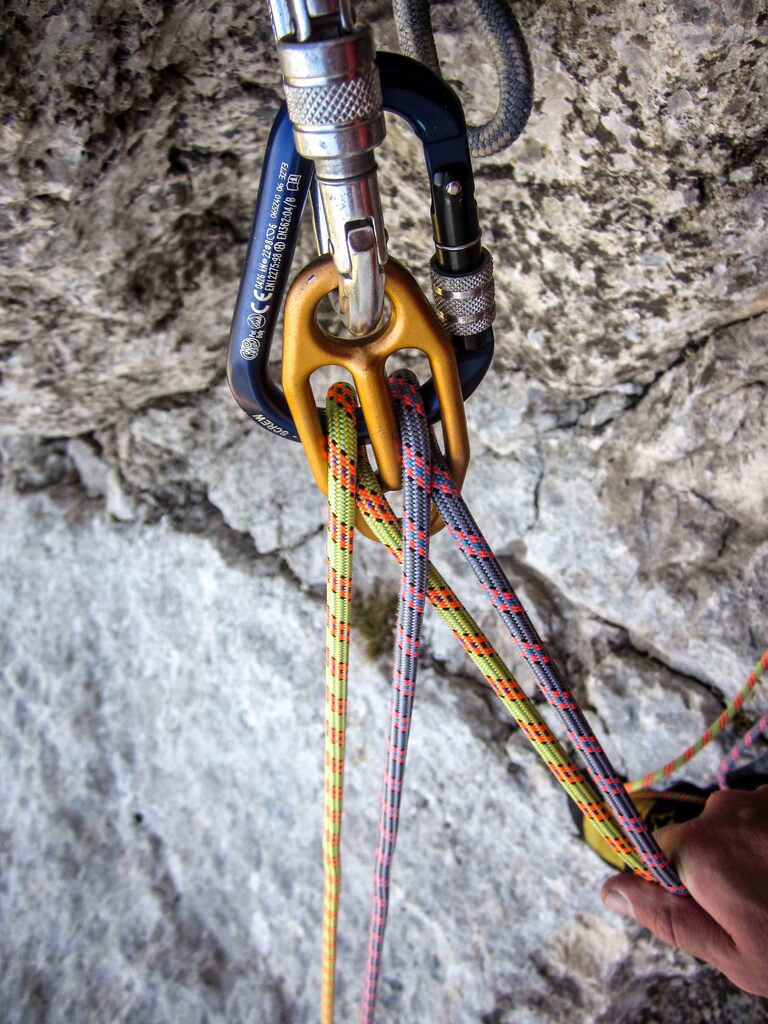
Tie the stopper knot at the end of the line and close the system. This means that the seam end never goes entirely over the support system and the climber drops down.
Often try binding to a land anchor if the climber is much bigger than you are. Floor anchors also, when you are required to load into a less than suitable place: you have an obstacle between yourself and the wall.
Set the belay unit to the nearest tube to your opposite hand by slipping a strip. Although most belay devices are geometric, those on one side of each tube have a ridged inside: If a thicker stepper or a cord is thinned or slicker than otherwise, this creates more friction.
Often at the top of your belay device, the clipper rope side of the hill reaches the anchor and drops down to the climber.
Put on a locking carabiner to travel between the straight and rear unit cable and the belay loop on the belt. Make sure the seam bow doesn't cross over your cord, to prevent stretching the cable on your belay unit. Lock the rifle.
3. Belay Technique
Proper Belay Stand
Athletically, this implies that you are moving, your non-dominant foot is twisted and your entire body is still calm.
This indicates that you're not too far from the wall, Physically. You're just stepping away from being immediately underneath the climber's road to prevent damage from the climber or a stone.
Organizationally, all ropes on the field are lined neatly so that they can not get twisted while you lie underneath them.
Proper Hand Position
- Brake hand: Put the dominant hand under the back of the device for around six inches and hold the seal tightly. There's a thumb and forearm up rather than down. (Note: when the brake hand is placed too close to the device, you could be punched seriously, which would lead to high risk of falling off the cab.) (Note:
- Assist hand: On the side of the climber, put the dominant hand. Obtain it at a height which is convenient to reach just above your head.
PBUS Technique
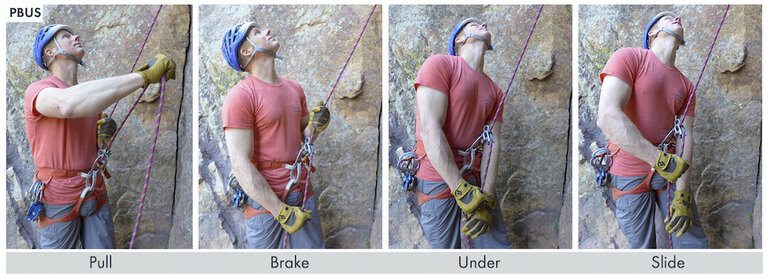
When you lay down a top rider, it's usually time to slack down as the individual ascends. The PBUS approach is an easy and efficient way of doing this:
- Pull: Pull the assist down and pull out the brake rope securely attached. When your companion climbs, that goes slack.
- Brake: Turn the brake rope backwards to close the rope in the rig as the handle lead approaches the belay device.
- Subject: Move the assisting hand to the rope of the brake, and place it under the brake. Grip tightly on the rope to build a new provisional brake side.
- Slide: Release your grip, don't wrap your initial brake hand's fingertips. Glide to its original location and hold it securely for six inches below the bottom of the device.
- Repeat: Return your assist to its original location and you're primed for a second time. Short fast PBUS sequences perform significantly well.
Catching A Fall
If it is because you hear the climber yell "Dropping!" and/or since you never take your eyes down, you have to respond rapidly. That's why you have such an important athletic belay.
If you tighten your hold, pull your brake hand down.
Use your body to withstand the force of dropping, belt, cord, and belay unit.
The body acts as a counterbalance to the body of the climber. If you have repeatedly slacked off when climbing, the gap between the climber and the resultant force would be comparatively small.
Note that the climbing cords are built to extend a bit, helping to withstand fall strength and, at the same time, to reduce the force on the body during the autumn.
Catching Who Pauses
For any cause, for instance, if a climber needs to break, take a rest, consider moving or get to the top of the climb, "Tension" is the control.
- Remove slackness from the rope
- Pull the wrist down your hand
- Release for the friction of the rope
- "Gotcha" shouts!
Conclusion
If you decide to climb Europe early, it might be a nice way to go with local people to find Figure eight, as long as you are competent with the local people before going for the crag!
You cannot go wrong with one of the earlier models of a retracting system, whether it is a tubular device or a brake device - the choice of a standing device is largely up to your individual opinion as explained in the introduction.
Obviously it depends on the kind of climb they prefer performing on the day, many climbers tend to have multiple standing devices on board. It is useful to be diversified as long as you know how to effectively and reliably use each one to reduce pain.


